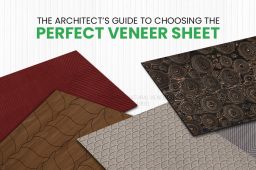
Where And How To Apply Veneers?
- May 06, 2019
- by
- Team Natural Veneers by Turakhia
Where:
In woodworking, veneer refers to thin slices of wood, usually thinner than 3 mm (1/8 inch), that typically are glued onto core panels (typically, wood, particle board or medium-density fiberboard) to produce flat panels such as doors, tops, and panels for cabinets, parquet floors and parts of furniture.
Also, Veneers being wood based product are mainly applied on Decorative interior and furniture applications for residential, commercial and hospitality sites.
How:
Veneer panels and Veneer edge bandings are currently being used by mechanized factories for furniture manufacturing with help of sophisticated machines like Panel saw, Multi boring and Edge banders.
Veneer panels are also used extensively on site by carpenters and contractors, Veneer applications is done with help of standard P V A glue with or without nailing process.
Applying wood veneer was once rumored to be a difficult task, reserved mainly for seasoned professionals. These days, since tools and supplies are readily available and many of the methods are so simple, even a novice woodworker can easily master the process. There are as many techniques for application as there are varieties of veneer, but contact cement is commonly regarded as the most practical method. It is also among the most enduring applications. Here are some guidelines to get you started as you learn how to apply the wood veneer.
Steps
Apply Veneers:
Step 1
Cut the substrate (the material that the veneer is actually applied to) to the exact finish size. This way, you can cut just the excess veneer with a razor knife and avoid damaging the finished product by using a table saw.
Step 2
Select the most appealing section of the veneer pattern, which will be visible in the finished piece, keeping in mind that any excess will be trimmed.
One effective way to isolate your preferred section is to make a cardboard template and cut to the identical size of the substrate panel by laying the substrate over the cardboard, marking the edges and then cutting the cardboard.
Step 3
Place your template over the desired section of veneer and cut out that portion. Leave approximately one-half inch, or 1.27 centimeters (0.5 in), of excess on each side.
Step 4
Center the selected pattern section over the substrate panel and apply the contact cement. Following the manufacturer’s instructions, apply both the veneer and the substrate. Allow it to set.
Be sure to mix the adhesive thoroughly before applying it. This will maximize its effectiveness.
Step 5
Use extreme caution when positioning the two elements for adherence. Since contact cement is so slip-resistant, they must be perfectly aligned on the first try
Step 6
Using maximum pressure, roll the veneer smooth by starting in the center and working out toward the edges using a veneer roller.
Step 7
Still using maximum pressure, smooth the surface with a smoothing blade to verify that the veneer completely adheres.
Step 8
Turn your piece upside down, use a razor knife to trim the excess using the edges of the substrate as your guide.
Run your hand over the area to be sure that the area is entirely smooth. If you do encounter any bubbles, repeat the two previous steps.
You can ensure a cleaner cut by scoring the surface first to determine the cut
Step 9
Allow ample time for curing and drying before finishing the piece.
Need More Info?
Visit our Website: http://www.naturalveneers.com
Call us: +91-22-25114285
Email: [email protected]
Comments are closed.


2 Comments
japanese knives review
8th May 2019 -I was suggested this blog by my cousin.
I am not sure whether this post is written byy him as no one else know such detailed about my
difficulty. You aree incredible! Thanks!
Jim
14th May 2019 -I am sure this post has touched all the internet visitors, its
really really nice paragraph on building up new blog.
These are actually fantastic ideas in concerning blogging.
You have touched some nice factors here. Any way keep up wrinting.
Everyone loves what you guys are usually up too.
This sort of clever work and coverage! Keep up the
excellent works guys I’ve incorporated you guys to my own blogroll.
http://dell.com